- 1. 什么是WSL 2
- 2. 备份
- 3. 安装Windows10系统
- 4. 初始化设置
- 5. 初始软件安装
- 6. WSL 2
- 6.1. 安装WSL2
- 6.2. 文件附件中不保留区域信息
- 6.3. 安装Nerd-fonts字体
- 6.4. 安装zsh
- 6.5. Zplug下载
- 6.6. (新)Oh My Zsh和主题powerlevel10k
- 6.7. pyenv
- 6.8. nodenv
- 6.9. goenv
- 6.10. jenv
- 6.11. rbenv
- 6.12. tfenv
- 6.13. Jupyter Lab
- 6.14. minikube
- 6.15. Flutter
- 6.16. (旧)Oh My Zsh和主题powerlevel10k
- 6.17. (旧)nvm
- 6.18. (旧)golang
- 6.19. (旧)java
- 6.20. VcXsrv
- 6.21. gcloud-cli
- 7. 安装Windows其他软件
- 8. 主板BIOS升级
- 9. 备忘录
- 10. 错误处理
- 11. 重装日志
- 2021年4月更新:这个月新的笔记本电脑到了,重置一遍主机 + 笔记本,修改并合并以前的windows配置日志
- 2021年10月更新:笔记本电脑升级至Windows11
- 2022年12月更新:主机电脑升级至Windows11
什么是WSL 2
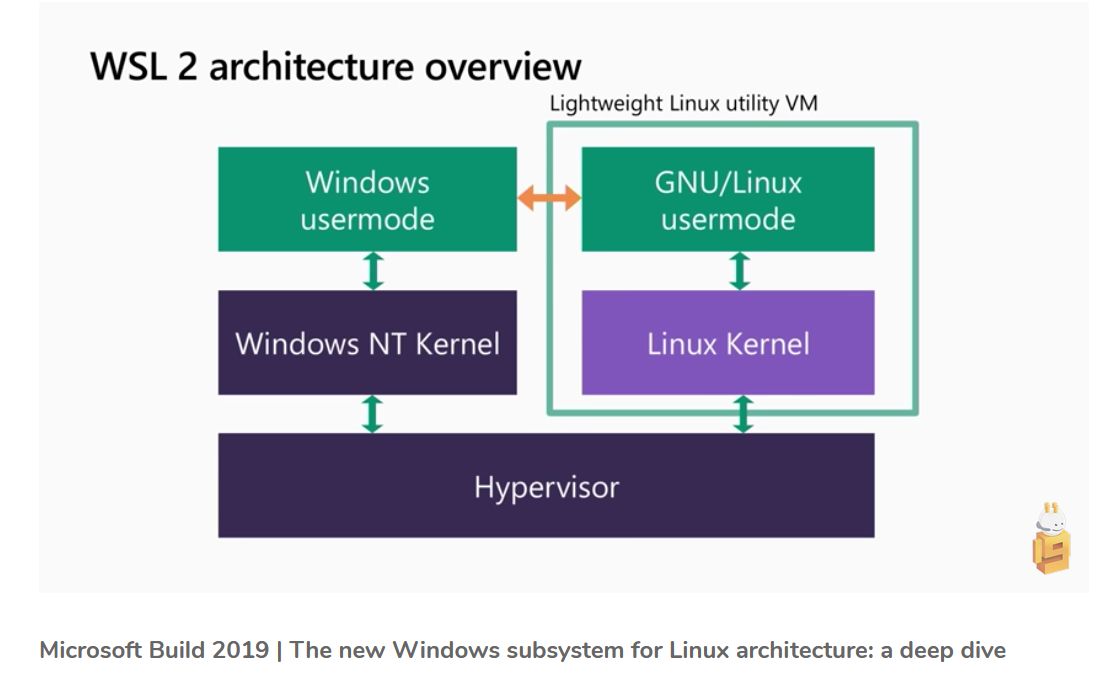
WSL 是适用于 Linux 的 Windows 子系统(Windows Subsystem for Linux),可以让开发人员原生运行 GNU/Linux 环境—— 包括大多数命令行工具、实用工具和应用程序。也就是说,对于使用 Windows10 系统的开发人员,要开发 Linux 环境下的程序——尤其是Linux环境下的 WEB 程序以及处理开源项目,以前只能使用虚拟机安装 Linux,但是虚拟机在使用中相当于一台独立的计算机,有许多不足,比如性能低、启动慢、管理不便、和宿主机 Win10 系统互操作不方便。WSL 就是为使用 Windows10 系统的软件开发人员准备的 Linux 开发环境
WSL2 是第二代 WSL,包含在2020年5月正式发布 Windows 10 v2004 版中。相比第一代,新的 WSL2 重新设计了架构,使用真正的 Linux 内核,几乎具有 Linux 的所有完整功能。启用WSL2的 Linux 系统启动时间非常快,内存占用很少,并且,WSL 2 还可以直接原生运行 Docker,VS Code 编辑器还有 Remote-WSL 插件,相对于完整的 linux 虚拟机只是不支持 systemctl、systemd,不能直接运行图形桌面。Windows 也越来越向虚拟平台靠拢,Windows NT 内核和 Linux 内核都是运行在虚拟平台之上的,是平级的
备份
重置前需要先对原来系统盘上的文件进行备份到另一个扩展盘上
- 文档
- 桌面文件
- 需要的下载文件
- .ssh文件夹
- .gitconfig
- .wslconfig
- .vscode使用Github备份
- MobaXterm导出配置文件
- FileZilla导出配置文件
- WSL2的文件
- WSL2的setting.json文件
~/.jupyter/lab/user-settings下jupyter lab的配置文件
备份完成后重置即可(删除所有文件)
注意:重置开始时要拔掉网线,或者不要连接网络,否则自动登陆微软账号
安装Windows10系统
主机重置的话可以重新装系统,如果不需要重新抹掉系统这里可以跳过
准备刻录U盘
准备一个大小大于8GB的U盘,并找一台windows10电脑,进入微软官网的Win10安装工具下载地址,下载并运行Win10安装工具
- 点击接受
- 选择为另一台电脑创建安装介质
- 选择语言,版本和体系结构
- 选择要使用的介质:U盘
- 等待进度条即可
安装U盘制作完成后就可以拔下U盘了
开始安装
注意:这里保持拔掉网线状态
组装好电脑之后将制作的安装U盘插到机箱背部的USB3.0接口处,开机后根据提示选择启动顺序(技嘉:F12),选择BOOT MENU即可,然后选择前缀有UEFI的U盘
然后进入到蓝屏界面,点击:
- 下一步
- 现在安装
- 我没有产品密钥
然后选择Windows10专业版,然后点击自定义安装,然后选择用于安装系统的固态用盘,重装的话要把原来的系统盘删除,然后会出现一个刚才系统盘的未分配空间,点击新建,点击应用,不建议分区,C盘空间大一些比较好,然后点击确定。然后选择刚才新建的驱动器分区中的主分区,点击下一步,等着进度条读完就可以拔下U盘了,接下来系统会自动重启几次
然后进行初始化设置
特别注意,这里设置的用户名即为打开终端里面显示的用户名(username)
嘿!别来无恙啊
出现后需要等一会儿即可
初始化设置
Windows更新
连上网以后,先更新Windows,因为这会花费较长时间
登陆微软账户
打开设置,找到账户信息,该用 Microsoft 账户登陆,然后修改设备名称(hostname)
修改时区
初始化时选择了中文,这里将时区修改为UTC+09:00
下载语言包
根据需要下载所需语言包
Windows功能
维基百科,在计算机安全领域,沙盒(sandbox)是种安全机制,为执行中的程式提供的隔离环境。通常是作为一些来源不可信、具破坏力或无法判定程序意图的程序提供实验之用
如果是Windows Pro的话,打开控制面板-程序和功能-启用或关闭Windows功能中启用Windows沙盒
- 若发现无法启用
Windows沙盒,打开BIOS启用SVM即可
卸载自带的软件
例如dell会装一些自带的软件,McAfree杀毒软件,不需要的话可以删除(不删除的话后面chocolatey不让用)
Edge浏览器的同步和设定
- 地址栏和搜索:使用google默认搜索引擎
- 使用安全的DNS指定如何查找网络的网络地址:关闭,因为自己使用ADGUARD,使用自己的DNS服务器
邮箱绑定
逐一绑定邮箱,域名邮箱yandex的密码要去:account management -> passwords and authorization -> app passwords中设置添加
2021年5月25日起,不再使用yandex,开始使用zoho:
在安全-特定应用的密码中添加即可
初始软件安装
Microsoft Store下载软件
Microsoft Store下载其中一部分软件,同时卸载一些自带不用的软件,并关闭onedrive备份
- QQ桌面版
- Line
- Slack
- Telegram
- Microsoft Whiteboard
- Microsoft To Do
- MSN天气
- Ubuntu 20.04 LTS
- Windows Terminal
- iTunes
Chocolatey
安装
Chocolatey是Windows的包管理软件,类似于Mac OS上的brew
打开Windows Terminal,记得是管理者权限运行,输入
1 | Set-ExecutionPolicy Bypass -Scope Process -Force; [System.Net.ServicePointManager]::SecurityProtocol = [System.Net.ServicePointManager]::SecurityProtocol -bor 3072; iex ((New-Object System.Net.WebClient).DownloadString('https://chocolatey.org/install.ps1')) |
安装完成后输入
1 | choco |
使用
即可确认安装完成
打开网站,开始安装程序,例如安装Chrome浏览器,只需要输入
1 | choco install googlechrome |
即可完成安装,非常方便。在Chocolatey上可以安装原先电脑上绝大部分软件。
这次重置想使用Microsoft Eage浏览器,在下载完chrome浏览器后只需要设置Microsoft Eage浏览器中的导入其他浏览器即可完成同步
接下来找自己需要用的其他软件下载即可:
- Git
- ccleaner
- zoom
- vscode
- PotPlayer
- mobaxterm
- sqlite
- mysql
- nextcloud
- rainmeter
- steam
- teamviewer
- qBittorrent
- drawio
- OBS Studio
- Tableplus
- Redis
- postman
- screentogif
- 7zip
- docker-desktop
- notion
- keepass
- vcxsrv
- discord
- androidstudio
- picard
- openhardwaremonitor
- wireshark
- kindle
- crystaldiskinfo
1 | choco install git.install ccleaner zoom vscode potplayer mobaxterm sqlitebrowser mysql.workbench nextcloud-client rainmeter steam teamviewer qbittorrent drawio obs-studio tableplus redis-desktop-manager postman screentogif 7zip docker-desktop notion keepass vcxsrv discord wechat androidstudio picard openhardwaremonitor wireshark kindle crystaldiskinfo |
其中PotPlayer,teamviewer安装会报错(现在似乎好了),只需要加上--ignore-checksums即可
1 | choco install potplayer teamviewer --ignore-checksums |
- sqlite安装完成后需要去C盘里面找然后固定到"开始"
查看所有程序列表
为了便于管理,我们有时候需要查看所有程序的列表。想知道自己用 Chocolatey 装了哪些程序:
1 | choco list --local |
查看更新
需要更新程序时,可以先检查一下哪些应用需要更新,使用 outdated 命令:
1 | choco outdated |
这样就会把所有「过期」的应用全部列出来,可以按需更新。升级与安装的命令格式相似:
1 | choco upgrade --yes vscode |
你也可以尝试一键升级所有程序,命令同样非常语义化,执行「升级」、「允许」操作、「所有」应用:
1 | choco upgrade --yes all |
现在,你可以不必担心每一个程序是否是最新版,因为你可以时不时运行一下更新命令;你也不用担心程序卸载不干净了,使用 Chocolatey 安装的程序,就可以用 Chocolatey 卸载
这个命令也可以简写为:
1 | cup all -y |
有可能是 choco 版本更新导致,目前 cup all -y 会报错
1 | choco list |
知其所以然
前面安装的时候提到过,Chocolatey 跟其他第三方软件管理器不同之处在于,其他软件管理器经常修改原来的安装包,从而可以夹带自己的广告,并且经常安装好之后发现并不是最新版本。但是 Chocolatey 不但使用官网链接下载,而且会在下载完成后使用数字摘要技术检查安装包是否跟官网上的完全一致,所以,你使用 Chocolatey 安装的就是最新纯净官网版本
此外,通过使用 info 命令,你还可以查看程序的详细信息,便于你确认是否需要使用 Chocolatey 来安装这个程序:
1 | choco info tim |
在这里列出了 Tim 的软件描述、更新时间、用户协议、官网链接、下载数、用于完整性检查的数字摘要,以及软件包的认证状态和测试状态。这些信息可以用来确认 Chocolatey 上的这个软件包是否可靠
报错修复
再一次检查更新中,软件安装过程中,家里突然跳闸了,之后重新安装时候发现每次都在相同的位置报如下错误:
1 | Error deserializing response of type chocolatey.infrastructure.app.domain.PackageFiles: '.', hexadecimal value 0x00, is an invalid character. Line 1, position 1. |
解决方法,卸载报错的程序,重新安装即可。参考:
pyenv-win
PowerShell:因为在此系统上禁止运行脚本的解决方案:
打开 PowerShell 然后输入 get-executionpolicy:
Restricted执行策略不允许任何脚本运行AllSigned和RemoteSigned执行策略可防止 Windows PowerShell 运行没有数字签名的脚本
以管理员身份打开 PowerShell 输入 set-executionpolicy remotesigned,选择 Y
安装pyenv-win
pyenv-win是python管理工具,可以切换任意版本的python
打开网站,并打开Windows PowerShell执行以下指令:
1 | git clone https://github.com/pyenv-win/pyenv-win.git $HOME/.pyenv |
1 | [System.Environment]::SetEnvironmentVariable('PYENV',$env:USERPROFILE + "\.pyenv\pyenv-win\","User") |
1 | [System.Environment]::SetEnvironmentVariable('path', $HOME + "\.pyenv\pyenv-win\bin;" + $HOME + "\.pyenv\pyenv-win\shims;" + $env:Path,"User") |
接下来打开终端:
1 | pyenv install 3.9.6 |
1 | pyenv global 3.9.6 |
1 | pyenv rehash |
每次安装后需执行pyenv rehash即可
使用
1 | python -m venv venv |
(旧)python虚拟环境
- 2022年:现已不用,因为发现安装后会跟wsl的python环境有冲突
虽然基本都在wsl下工作,但是有时为了测试程序在windows环境上是否可以正常运行,这里配置一下python虚拟环境,我选择的是自带venv模块创建虚拟环境
1 | python -m venv venv |
进入虚拟环境:
1 | .\venv\Scripts\activate |
启动虚拟环境报错时,打开PowerShell检查:
1 | get-ExecutionPolicy |
如果返回结果是Restricted,则表示系统禁止运行脚本,此时需要管理员权限打开PowerShell输入:
1 | set-executionpolicy remotesigned |
Windows PowerShell默认是Restricted(防止运行没有数字签名的脚本),要设置成remotesigned模式
再次运行:
1 | .\venv\Scripts\activate |
可以发现前面带有(venv),说明成功进入虚拟环境
1 | PS C:\Users\zhangqiang\Desktop\bilibili-downloader> .\venv\Scripts\activate |
flutter
下载 Flutter SDK
下载后解压至C:\src下,然后打开环境变量设置,User variables的Path下,添加C:\src\flutter\bin
环境确认:
1 | flutter --version |
下载 Android Studio
下载后打开并下载flutter的插件
1 | flutter doctor -v |
然后执行flutter doctor --android-licenses,发现报错:
1 | flutter doctor --android-licenses |
解决方案如下:
然后再次确认:
1 | flutter doctor |
vscode相关配置
首先下载flutter,dart等插件,关于调用VSCode模拟器(虚拟机),参考以下链接
WSL 2
安装WSL2
打开Windows PowerShell,按顺序复制网站指令:
- Step 1 - Enable the Windows Subsystem for Linux
1 | dism.exe /online /enable-feature /featurename:Microsoft-Windows-Subsystem-Linux /all /norestart |
- Step 3 - Enable Virtual Machine feature
1 | dism.exe /online /enable-feature /featurename:VirtualMachinePlatform /all /norestart |
然后重启电脑
- Step 4 - Download the Linux kernel update package
点击下载WSL2 Linux kernel update package for x64 machines,并安装
- Step 5 - Set WSL 2 as your default version
1 | wsl --set-default-version 2 |
- Step 6 - Install your Linux distribution of choice
打开Microsoft Store,下载Ubuntu 20.04 LTS
- Step 7 - Set up a new distribution
启动刚才下载的Ubuntu 20.04 LTS,创建用户名。然后创建密码即可
之后会进入终端,输入
1 | explorer.exe . |
之后,可以看到在Windows下成功打开了Linux环境,我们将它添加一个网络位置(\\wsl$\Ubuntu-20.04\home\zhangqiang)
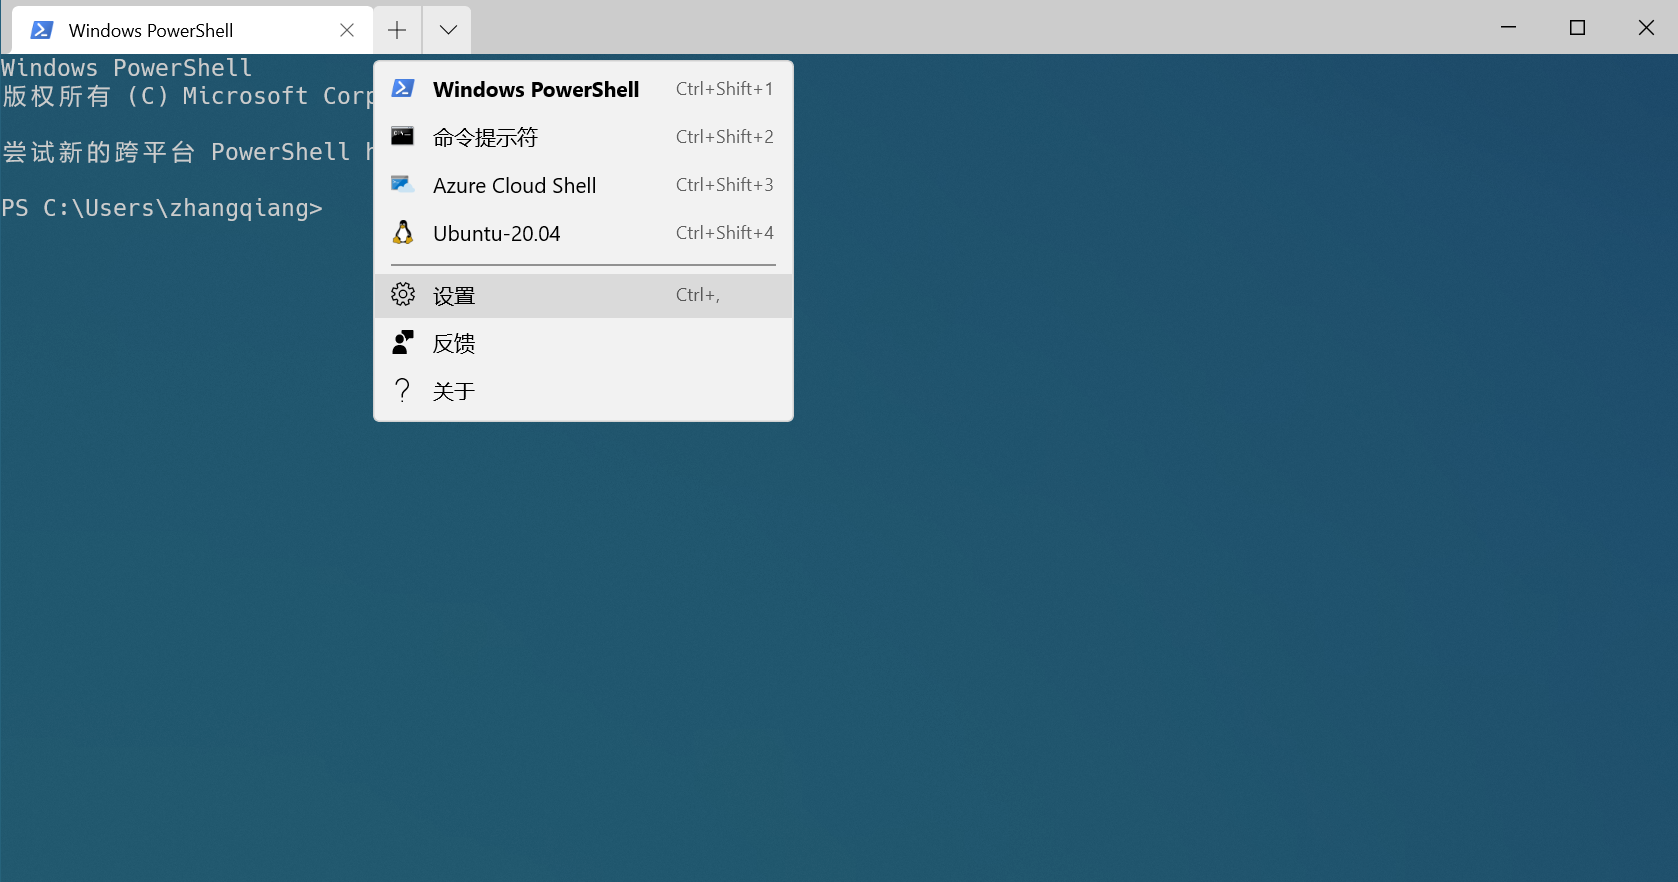
如图打开终端上的设置,setting.json文件配置如下:
1 | // This file was initially generated by Windows Terminal 1.2.2381.0 |
- 打开终端时默认打开种类设置:将对应的guid后面字符串复制到defaultProfile之后即可
- “defaultProfile”: “{61c54bbd-c2c6-5271-96e7-009a87ff44bf}”
文件附件中不保留区域信息
将windows上文件移动到wsl2时候,文件夹里面就会自动生成一个file_name.extention:Zone.Identifier格式的文件
配置:Win+R–>gpedit.msc–>User Configuration–>Administrative Templates–>Windows Components–>Attachment Manager–>“Do not preserve zone information in file attachments”–>Enabled–>OK
这样可以保证之后不再生成
安装Nerd-fonts字体
打开Nerd-fonts的github,下载字体并安装
安装zsh
万物始于更新
1 | sudo apt update && sudo apt -y upgrade |
1 | sudo apt install zsh |
然后切换到zsh:
1 | chsh -s /bin/zsh |
Zplug下载
Zplug是管理zsh的插件,首先安装Zplug,也可以写入.zshrc文件中下载:
1 | curl -sL --proto-redir -all,https https://raw.githubusercontent.com/zplug/installer/master/installer.zsh | zsh |
(新)Oh My Zsh和主题powerlevel10k
由于有多台设备,为了同步一些配置文件,aliases,终端配置,这里采用以下更方便的方法(参考网站):
- 下载oh-my-zsh:
1 | git clone https://github.com/ohmyzsh/ohmyzsh.git ~/.oh-my-zsh |
- 首先在git仓库上创建一个项目,项目内放置了
.ssh/config,.zshrc等文件 - 在本地创建bare仓库:(个人路径:~/work/repos/下)
1 | git clone --bare https://git.tyokyo320.com/zhangqiang/dotfiles.git |
- 初始化设置
1 | git --git-dir=$HOME/work/repos/dotfiles.git --work-tree=$HOME reset --hard master |
- 如果不想在本地修改配置文件,就直接在gitea上编辑修改提交,然后本地拉取:
1 | git --git-dir=$HOME/work/repos/dotfiles.git --work-tree=$HOME pull |
为了方便,在./zshrc文件后添加
1 | alias sync-config='git --git-dir=$HOME/work/repos/dotfiles.git --work-tree=$HOME' |
这样以后修改完以后直接本地拉取:
1 | sync-config pull |
即可
如果想本地编辑的话,就在克隆一个仓库至本地,修改提交至git仓库,然后本地拉取同步
pyenv
安装pyenv
首先安装必要的库,不然无法安装python版本
1 | # c++ compiler |
1 | # openssl |
1 | sudo apt install -y zlib1g-dev |
1 | # bz2, readline, sqlite3 |
根据个人需要有可能还需要安装:
1 | sudo apt install -y libffi-dev |
参考网站:
- Check out pyenv where you want it installed. A good place to choose is $HOME/.pyenv (but you can install it somewhere else).
1 | git clone https://github.com/pyenv/pyenv.git ~/.pyenv |
因为zplug中已经写好,clone完直接重启终端,确认pyenv,然后开始安装python:
1 | pyenv install --list |
这里我选择安装的版本为:
1 | pyenv install 3.9.4 |
1 | pyenv versions |
切换python版本
切换python版本做一下测试
1 | pyenv global 3.9.4 # 全局进行切换到python 3.9.4版本 |
例如:
1 | pyenv global 3.9.4 |
可以看到当前的python 版本已经切换到3.9.4了
同理,我们可以继续用python global在各个版本之间进行切换,如果要切换回系统版本,请用:
1 | pyenv global system # 全局进行切换到系统自带python |
虚拟环境的使用
首先新建一个名为venv的虚拟环境:
1 | python -m venv venv |
然后启用虚拟环境:
1 | source venv/bin/activate |
退出虚拟环境:
1 | deactivate |
查看安装的package及其版本:
1 | pip freeze |
一键安装package:
首先把已经安装的package导入到requirements.txt里面
1 | pip freeze > requirements.txt |
在另一个新建的虚拟环境中一键安装即可
1 | pip install -r requirements.txt |
在.gitignore里面一般会添加:venv
nodenv
本次重置window上面没有安装python和node.js的虚拟环境,打算只安装在wsl下:
- Clone nodenv into ~/.nodenv.
1 | git clone https://github.com/nodenv/nodenv.git ~/.nodenv |
- 在
.zshrc文件中的zplug里面加入zplug "C-uo/zsh-nodenv", from:github即可 - 这个时候在终端输入nodenv可以看到变绿色了,但是还不能install,需要build一下,参考网站
1 | # As a nodenv plugin |
然后就可以查看node版本号
1 | # list all available versions: |
- 安装,这里选择了常用版本14.16.1
1 | # install a Node version: |
- 查看和设置版本
1 | nodenv versions |
装完这里,blog应该可以运行了
1 | # 新建一篇日志 |
goenv
本次更新配置golang的虚拟环境:如果发现已经有.goenv了可以删除重新clone一次,这样会有最新版本的go
参考zplug部分:
- Check out goenv where you want it installed. A good place to choose is
$HOME/.goenv(but you can install it somewhere else).
1 | git clone https://github.com/syndbg/goenv.git ~/.goenv |
zplug "RiverGlide/zsh-goenv", from:gitlab添加到~/.zshrc文件中即可
查看可以安装的版本:
1 | goenv install --list |
使用:
1 | # 安装 |
1 | goenv rehash |
使用:
1 | goenv exec go run main.go |
jenv
本次更新配置jenv,jenv是用来管理一台机器上多个JDK版本的,并且可以随时切换版本使用
前面已经下载好了JDK11,个人本地路径下载至:~/library/java/下
参考网站
- Installing jenv
1 | git clone https://github.com/jenv/jenv.git ~/.jenv |
zplug "plugins/jenv", from:oh-my-zsh添加到~/.zshrc文件中,刷新终端- 【补充】To make sure
JAVA_HOMEis set, make sure to enable the export plugin:
1 | jenv enable-plugin export |
- Adding Your Java Environment:
1 | jenv add /home/zhangqiang/library/java/jdk-11.0.11/ |
添加后可以查看
1 | jenv versions |
然后选择:
1 | jenv global oracle64-11.0.11 |
查看:
1 | java -version |
检查:
1 | jenv doctor |
rbenv
- Installing rbenv
1 | git clone https://github.com/rbenv/rbenv.git ~/.rbenv |
zplug "plugins/rbenv", from:oh-my-zsh添加到~/.zshrc文件中,刷新终端
1 | rbenv |
- 这个时候在终端输入
rbenv可以看到变绿色了,但是还不能install,需要build一下,参考网站
1 | # As an rbenv plugin |
然后可以查看ruby版本号
1 | rbenv install -l |
- install
1 | rbenv install 3.1.2 |
- set a version
1 | rbenv global 3.1.2 |
- check
1 | rbenv versions |
1 | ruby --version |
tfenv
1 | $ git clone --depth=1 https://github.com/tfutils/tfenv.git ~/.tfenv |
1 | $ tfenv list-remote |
1 | $ tfenv use 1.8.3 |
Ruby on Rails
Ruby on Rails 是一个面向对象的 web 开发框架,在日本,依然有很多公司在使用
Gem是 Ruby 中的包,其中包含包信息,以及用于安装的文件。Gem 通常是依照.gemspec文件构建的,其为 YAML 文件。然而,Ruby 代码也可以直接创建 Gem,这种情况下通常利用Rake来进行.gemspec文件其中包含 Gem 有关的信息,例如版本号、作者、联系邮件以及依赖等,例如 cocoapods.gemspec
RubyGems是 Ruby 的一个包管理器源,提供了分发 Ruby 程序和库的标准格式 gem,旨在方便地管理 gem 安装的工具,以及用于分发 gem 的服务器源。这类似于 Python 的 pipBundler能够跟踪并安装所需的特定版本的 gem,以此来为 Ruby 项目提供一致的运行环境。定义一个 Gemfile,说明想要包含哪些库,并且可以选择指定版本或范围。运行 bundle install,它会生成一个 Gemfile.lock,说明所有库的确切版本,然后 bundle install 使用该项目运行的任何其他人都会获得完全相同的版本
- install
1 | gem install bundler rails |
- check gem, rake, rails versions
1 | # gem versions |
- how to use
1 | # eg. directory name: blog |
Jupyter Lab
安装Jupyter Lab
开启一个项目的python虚拟环境再执行,不要安装在全局里面
1 | pip install jupyterlab |
注意,第一次安装有可能报错:
1 | Collecting jupyterlab |
解决方案:
1 | sudo apt-get install libffi-dev |
退出虚拟环境,重新安装一次python(重新编译安装)
1 | pyenv install 3.9.4 |
扩展插件
1 | pip install jupyter_contrib_nbextensions jupyter_nbextensions_configurator |
~/.jupyter/lab/user-settings下有配置文件详细设置
minikube
Minikube是一个本地的Kubernetes开发环境
Flutter
安装
解压至~/library下
然后打开.zshrc文件引入环境变量:
1 | export PATH="$PATH:[PATH_OF_FLUTTER_GIT_DIRECTORY]/bin" |
保存并刷新,然后运行检查
1 | flutter doctor |
配置
1 | sudo apt install clang curl pkg-config ninja-build cmake libgtk-3-dev libblkid-dev liblzma-dev unzip |
1 | flutter config --enable-linux-desktop |
1 | flutter doctor |
由于性能考虑,现在已经不在WSL 2上开发flutter了,而且会有图形界面等问题因素,因此转移至windows下开发
(旧)Oh My Zsh和主题powerlevel10k
1 | sh -c "$(curl -fsSL https://raw.githubusercontent.com/robbyrussell/oh-my-zsh/master/tools/install.sh)" |
1 | chsh -s /bin/zsh |
1 | git clone --depth=1 https://github.com/romkatv/powerlevel10k.git ${ZSH_CUSTOM:-$HOME/.oh-my-zsh/custom}/themes/powerlevel10k |
然后更改文件~/.zshrc
就修改主题为ZSH_THEME="powerlevel10k/powerlevel10k",保存退出
重开终端后,会有几个样式选择问题,根据喜好回答即可
(旧)nvm
本来想安装却发现nvm已经有了,这是因为在win上面安装过了,WSL 2环境相通,所以这里可以不用再安装了
1 | whereis nvm |
这里只需要安装node.js即可,首先查看nodejs的版本号:
1 | nvm ls-remote |
然后安装:
1 | nvm install 12.18.4 |
这样blog在WSL 2上也可以运行了
(旧)golang
1 | mkdir library |
在新建的文件夹内下载:
1 | wget https://golang.org/dl/go1.15.2.linux-amd64.tar.gz |
然后解压
1 | tar -zxvf go1.15.2.linux-amd64.tar.gz |
打开.zshrc添加如下:
1 | # go |
然后重启终端即可
(旧)java
下载JDK
首先安装JDK,至于版本选择,可以选择稳定的JDK 8或者JDK 11,这里我选择的是JDK 11
打开ORACLE下载JDK11的地址,选择合适的安装包
1 | uname -m |
- 这里我选择的是
Linux x64 Compressed Archive
将下载的压缩包移动到WSL 2下的/library/java里,解压缩:
1 | tar xvzf jdk-11.0.11_linux-x64_bin.tar.gz |
解压后,本次重置采取jenv来管理一台机器上多个JDK版本的,不再采用以前配置方法
配置环境变量
打开.zshrc添加如下:
1 | # jdk环境 |
重新加载zshrc:
1 | source .zshrc |
然后测试环境:
1 | java -version |
自己的library下文件管理情况:
1 | tree -L 2 |
VcXsrv
参考网站:
使用WSL 2时,不能直接显示图片是件挺麻烦的事,例如,之前我想让程序显示图片的时候得到No X11 DISPLAY variable was set, but this program performed an operation which requires it.的报错,我的解决方式是在Windows系统安装并下载VcXsrv(前面已经用choco安装过了),WSL 2将通过它把图片输出到Windows并在屏幕上显示
安装好以后,首先到控制面板的防火墙设置中,需要配置防火墙,外界网络访问VCXSRV的端口,然后启动VCXSRV,前面基本默认设置即可,但是Extra settings中的Disable access control一定要选这一项!
WSL 2相当于远程(外界)网络了,和Windows10是分开的,和WSL1不一样
windows终端中查看WSL 2中的IP:ipconfig,然后打开~/.zshrc,添加
1 | export DISPLAY=[HOST]:[DISPLAY NUMBER] |
或者在终端中输入
1 | echo "export DISPLAY=172.17.80.1:0.0" >> ~/.zshrc |
1 | source .zshrc |
可以检查一下设置:
1 | echo $DISPLAY |
以后每次想查看WSL中的图片,都要先启动XLaunch
WSL 2下的ip地址会变,需要在.zshrc中对应修改!
gcloud-cli
1 | sudo apt update && sudo apt upgrade -y |
1 | # 添加 Google Cloud SDK 软件源 |
1 | gcloud init |
1 | gcloud version |
安装Windows其他软件
Office365
登陆Office student 365下载
- 安装后Teams需要重启才能显示出来
Adobe
上个月学校给的账号过期了,先等等学校,如果不给免费的用就打算再续费一年
- XD
欧路词典
NVIDIA驱动程序
选择自己显卡型号下载即可
Logicool G HUB
- 官网链接下载即可
Logitech Unifying
- 官网链接下载即可
TeX Live
现在使用docker部署latex环境
.devcontainer文件夹移动到latex项目下
先打开桌面版docker,第一次部署首先要build镜像,回到vscode,通过设置搜索Remote-Containers: Rebuild and Reopen in Container
其实就是把本地文件绑定到有latex环境的docker容器内
Citavi
百度网盘
Cisco AnyConnect VPN
学校官网下载
EPOCCAM DRIVER
iPhone手机 使用的时候,必须先启动 iTunes,然后打开手机app即可连接
(旧)nvm-windows
打开网站,下载nvm-setup.zip。然后控制面板-系统-高级系统设置-环境变量-path中添加C:\Users\zhangqiang\AppData\Roaming\nvm,然后重启终端
1 | nvm list available |
安装:
1 | nvm install 12.18.4 |
1 | node |
接下来安装hexo:
1 | npm install -g hexo-cli |
这里我遇到了一个问题,安装完成后却无法执行hexo,发现是PowerShell给我禁止了,解决方案如下:
以管理员身份打开PowerShell 输入set-executionpolicy remotesigned,选择:是
然后blog就复活了!
主板BIOS升级
- 2021年11月更新:BIOS 版本由
F51升级至F62d - 2023年3月更新:BIOS 版本由
F62d升级至F64a - 2025年4月更新:BIOS 版本由
F64a升级至F65g
下载BIOS
然后准备一个格式化好的U盘,将下载解压后最大的那个文件移动到U盘中
进入BIOS升级
插入U盘,重启进入BIOS -> 系统 -> Q-Flash中选择更新,等待一段时间后更新会完成
升级BIOS时遇到的问腿
升级结束后,发现WSL 2打不开了:请启用虚拟机平台 Windows 功能并确保在 BIOS 中启用虚拟化,打开任务管理器 -> 性能 -> CPU后发现:虚拟化显示已禁用
解决:重启进入BIOS,M.I.T. -> Advanced Frequency Settings -> Advanced CPU Core Settings -> SVM Mode,启用SVM Mode,然后保存退出
备忘录
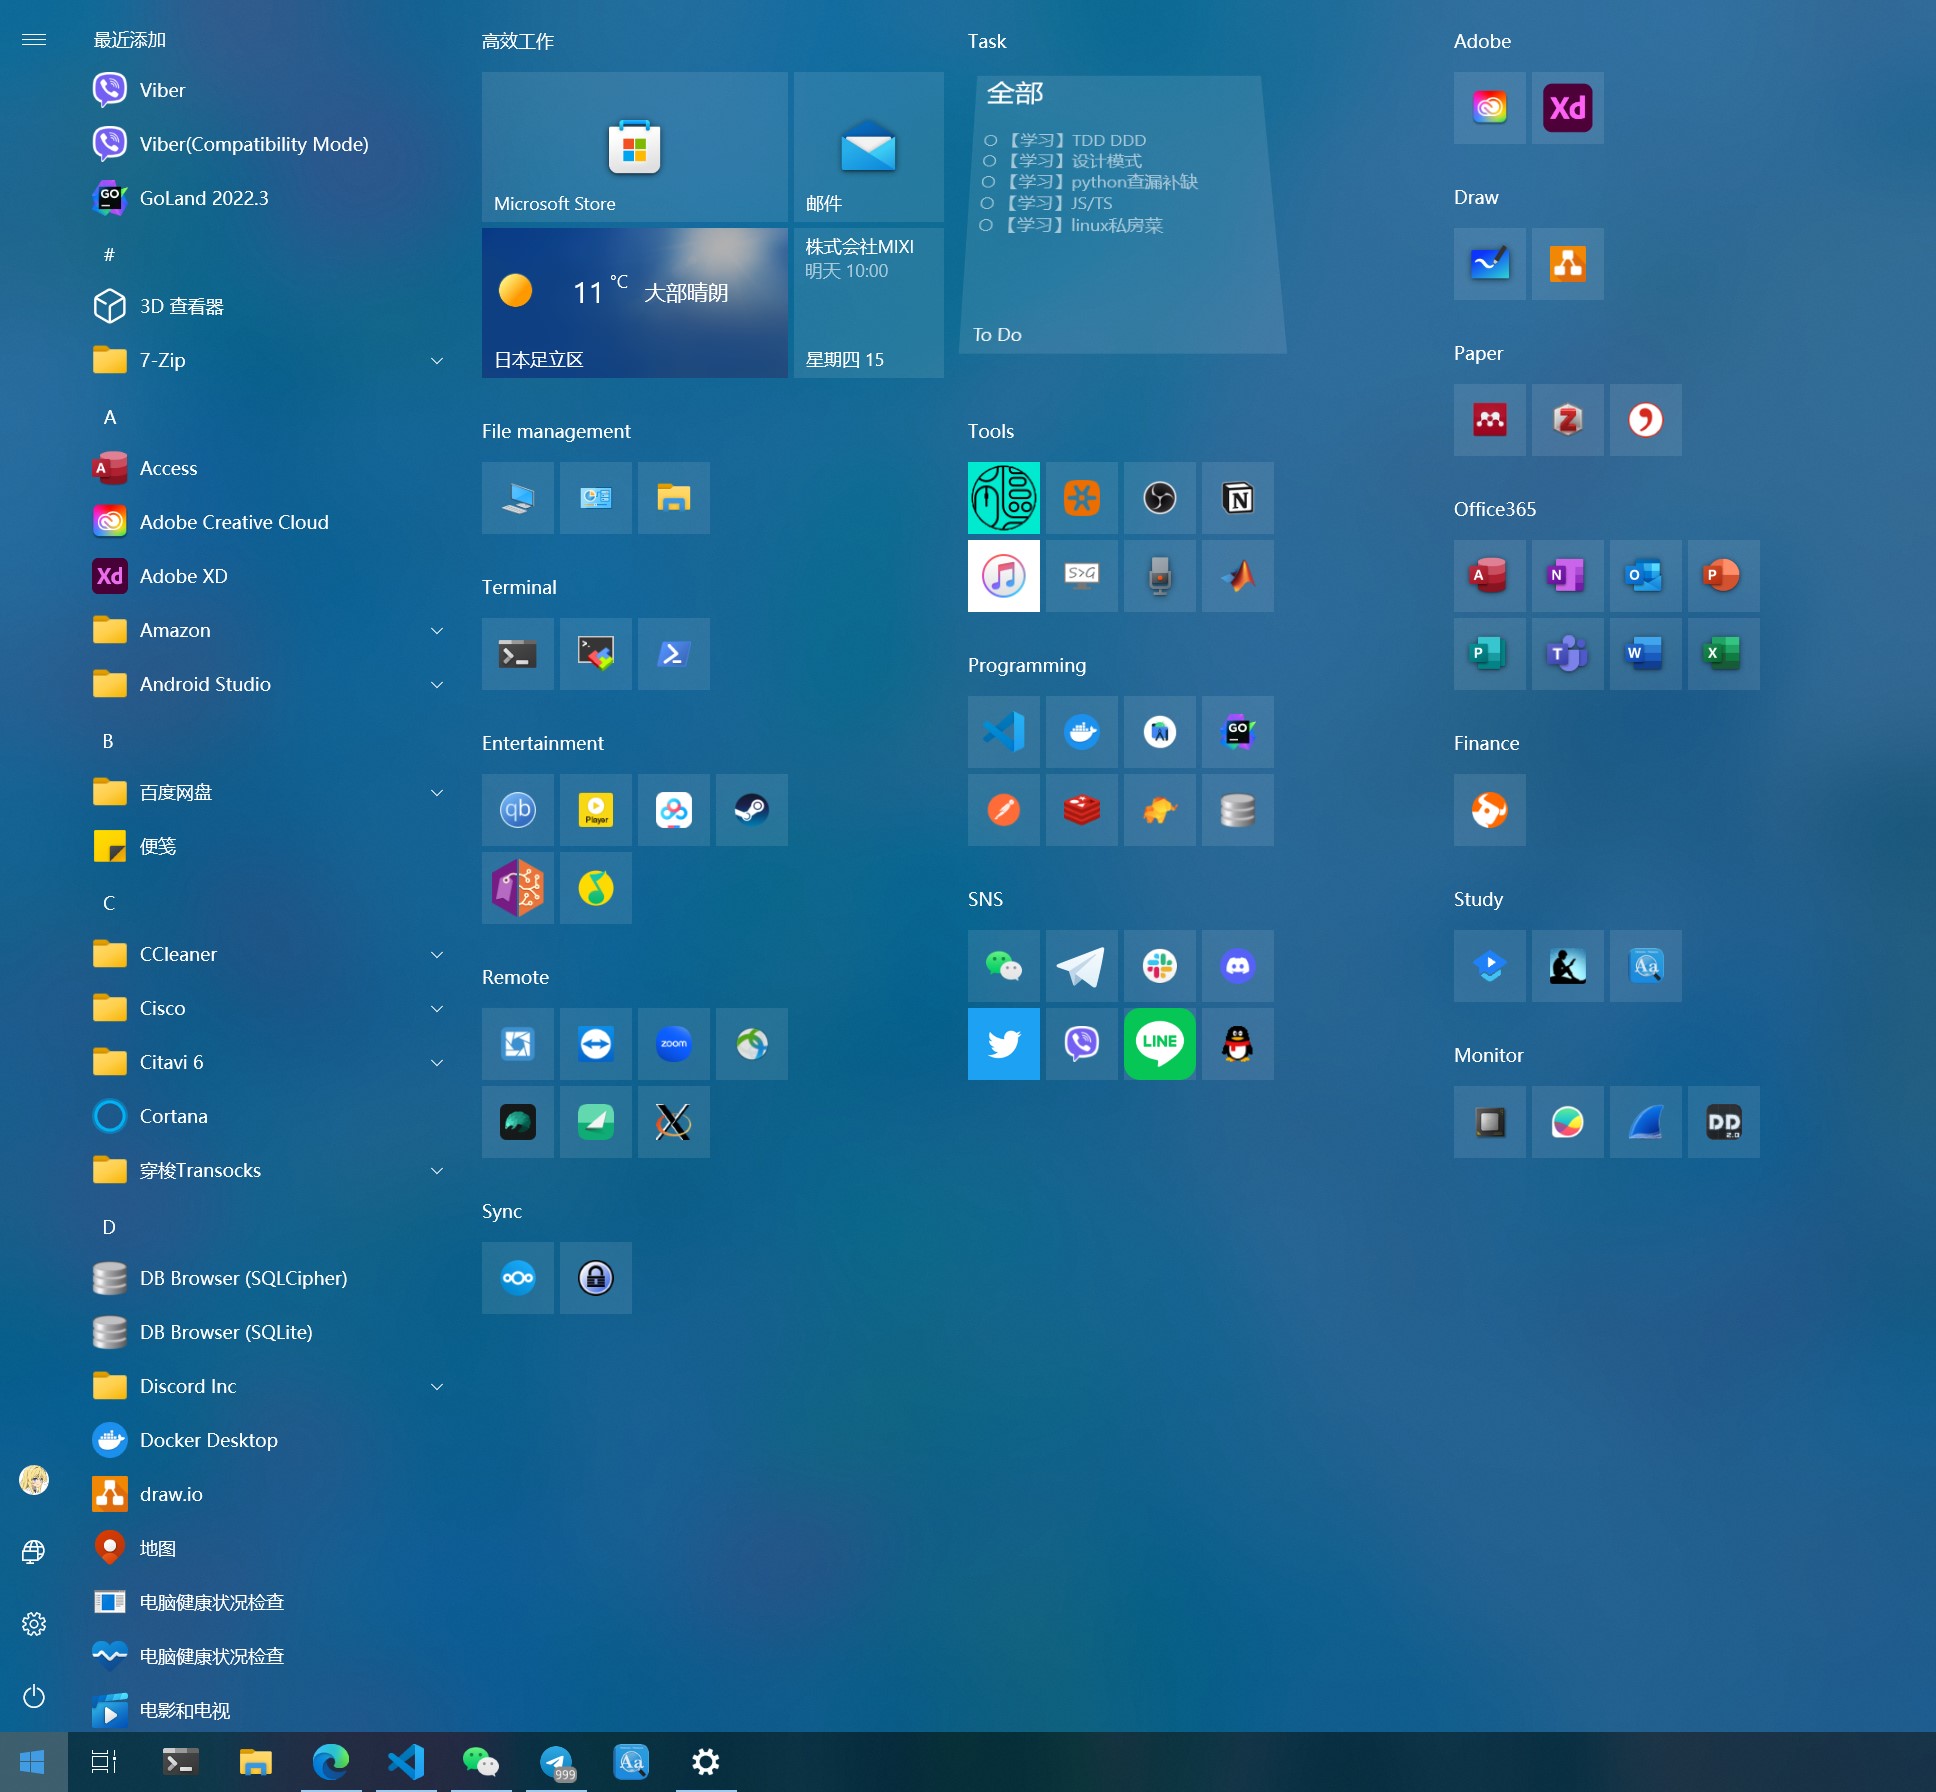
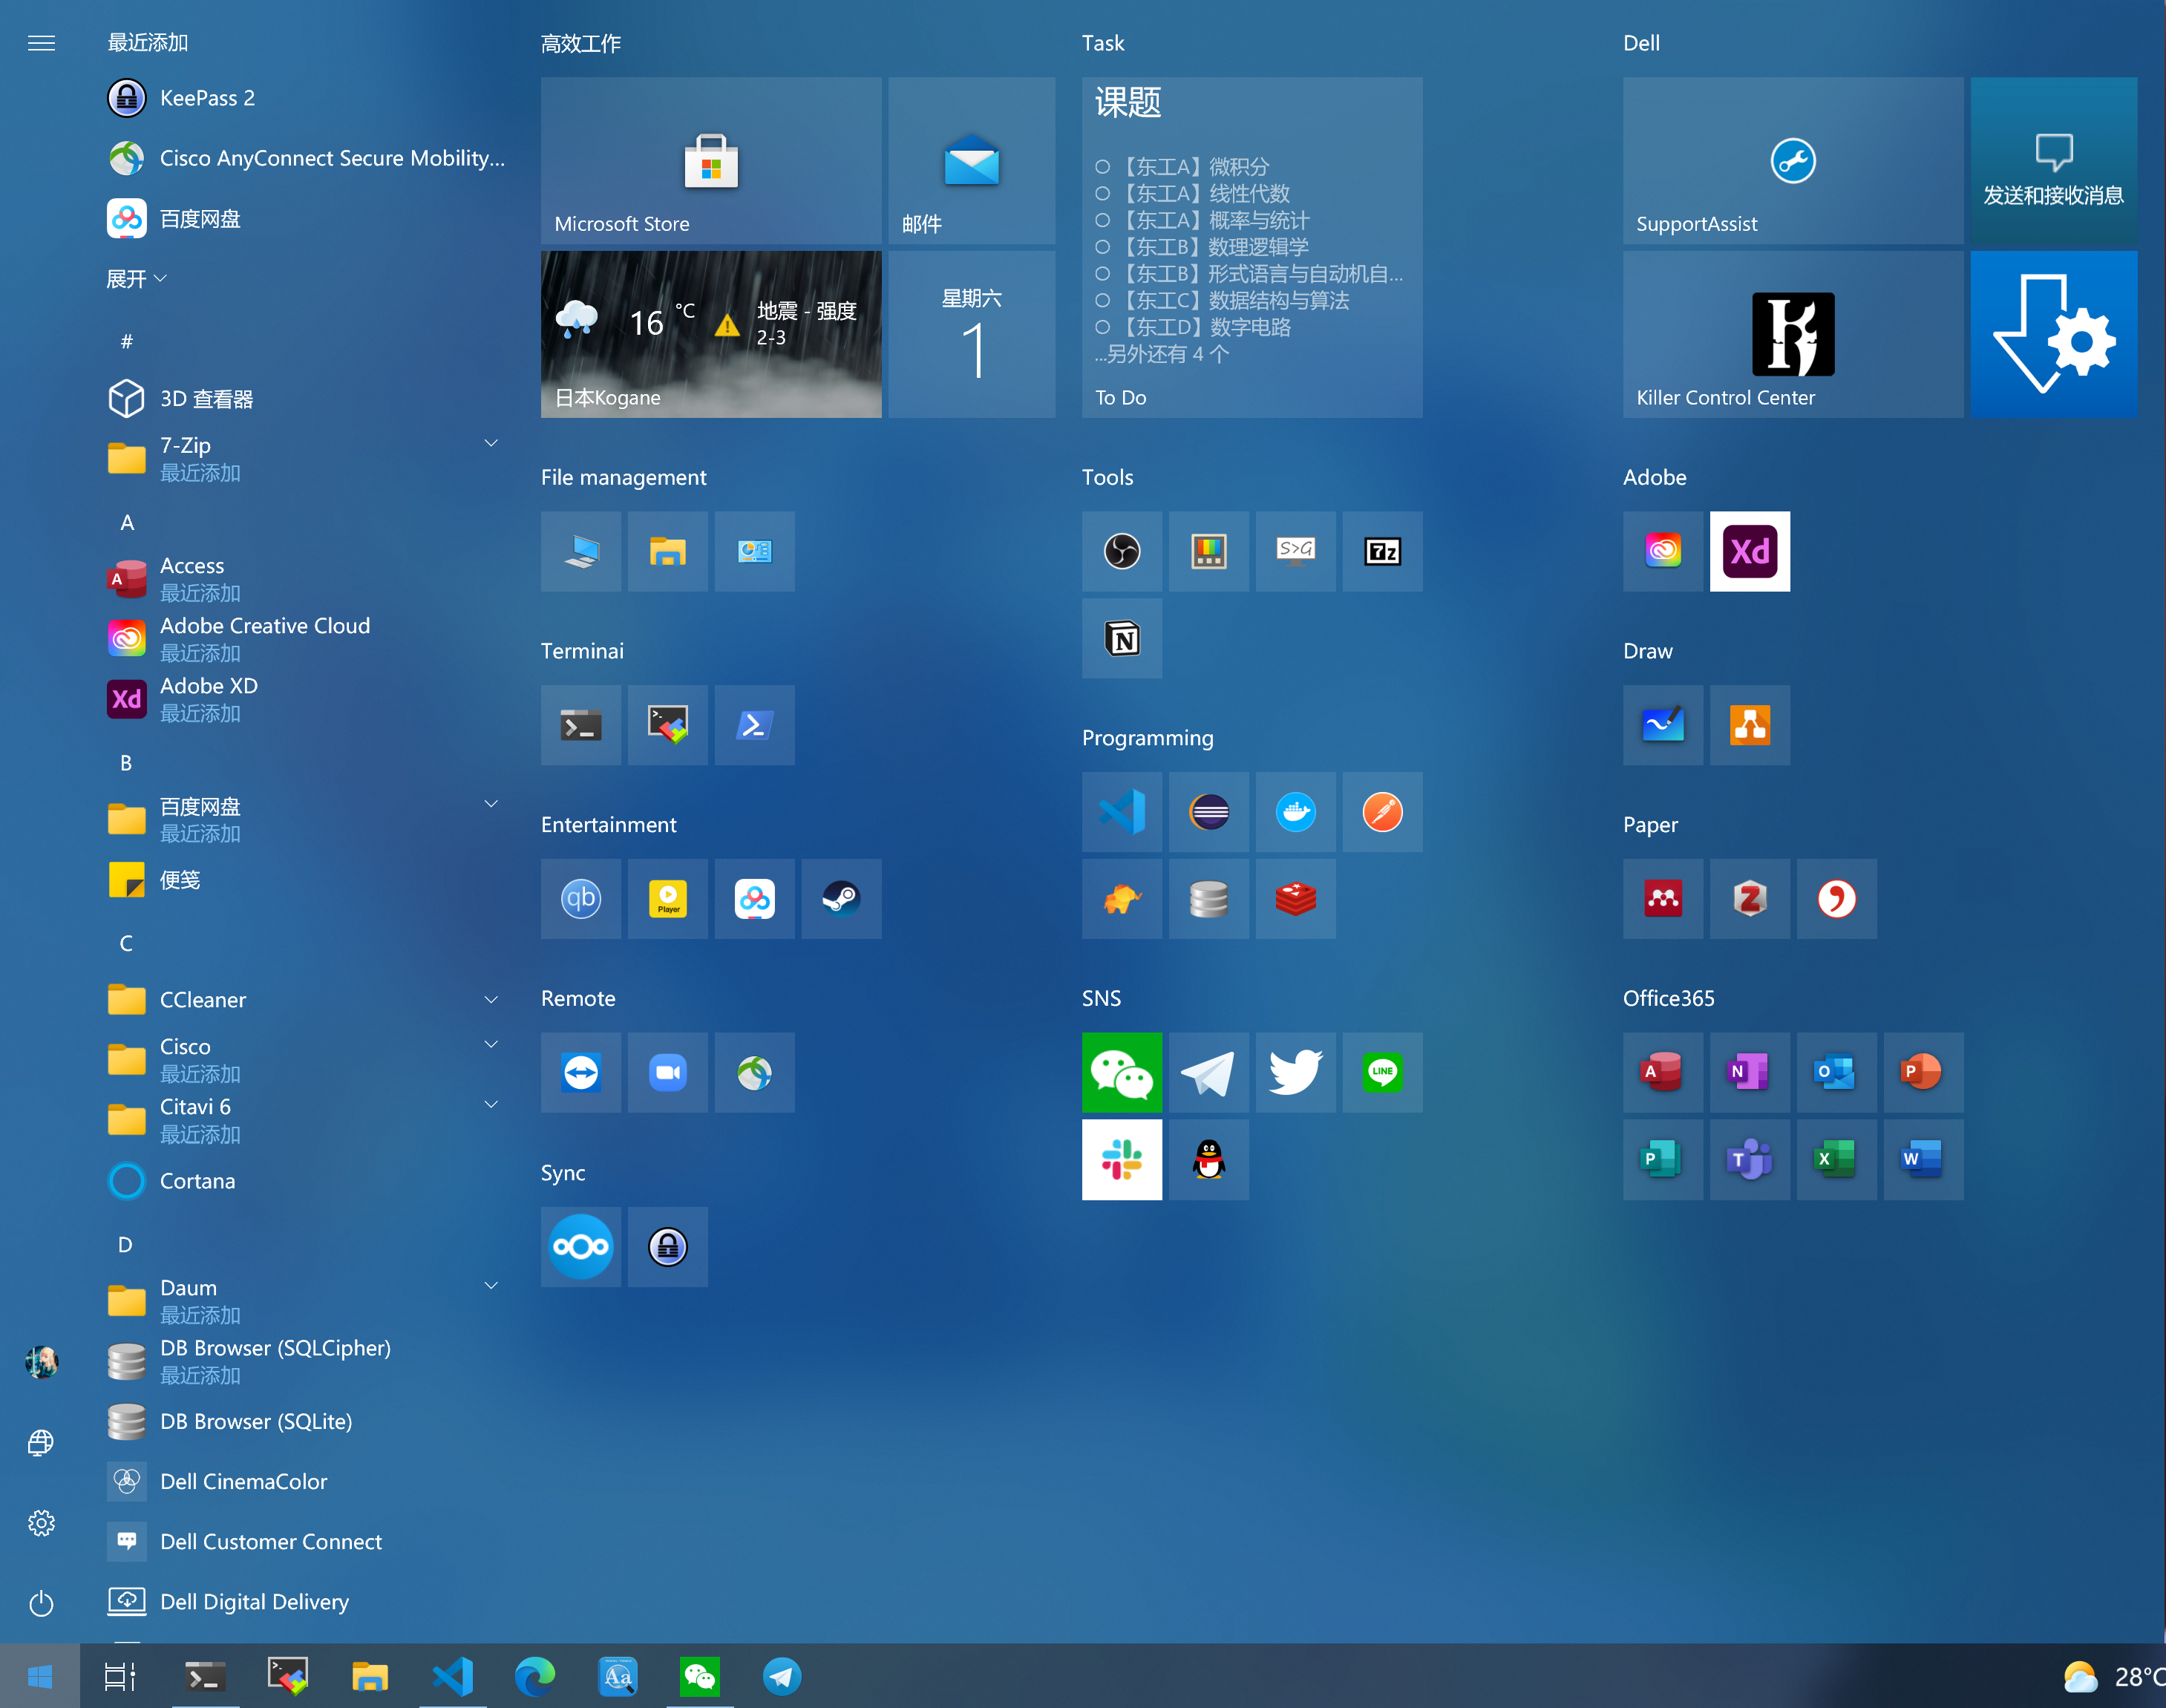
开始预览图
- Window11版本中,自定义磁条被删除…
PC开始预览图
XPS开始预览图
ssh的权限说明
1 | chmod 700 ~/.ssh |
DNS设置
每次重装服务器或重置电脑需要设置ipv4和ipv6DNS指向服务器
- ipv4:192.168.10.106
- ipv6:
1 | ifconfig |
需要修改电脑ipv4和ipv6DNS的服务器,让它分别指向服务器的ipv4和ipv6
这样Portainer和AdGuard Home就可以打开了
samba添加到网络位置
重置后,网络位置需要重新添加,详情参考网站:
- 右击开始按钮,点击设置
- 点击应用,打开应用程序和功能
- 点击启用或关闭Windows功能
- 勾选SMB1.0协议,点击确定
- 按住“Win”和“R”键,在弹出的对话框中输入“gpedit.msc”
- 在本地组策略编辑器对话框中,依次点击“计算机配置”“管理模板”“网络”
- 点击“lanman工作站”
- 双击“启用不安全的来宾登录”,点击“已启用”,点击“确定”即可
最后添加网络位置,这里不知道为什么我其实输入的网络地址一直是对的但是很久没有添加成功,即使使用其他凭据连接,输入了正确密码还是失败,最后却神奇的添加上了
问题解决:
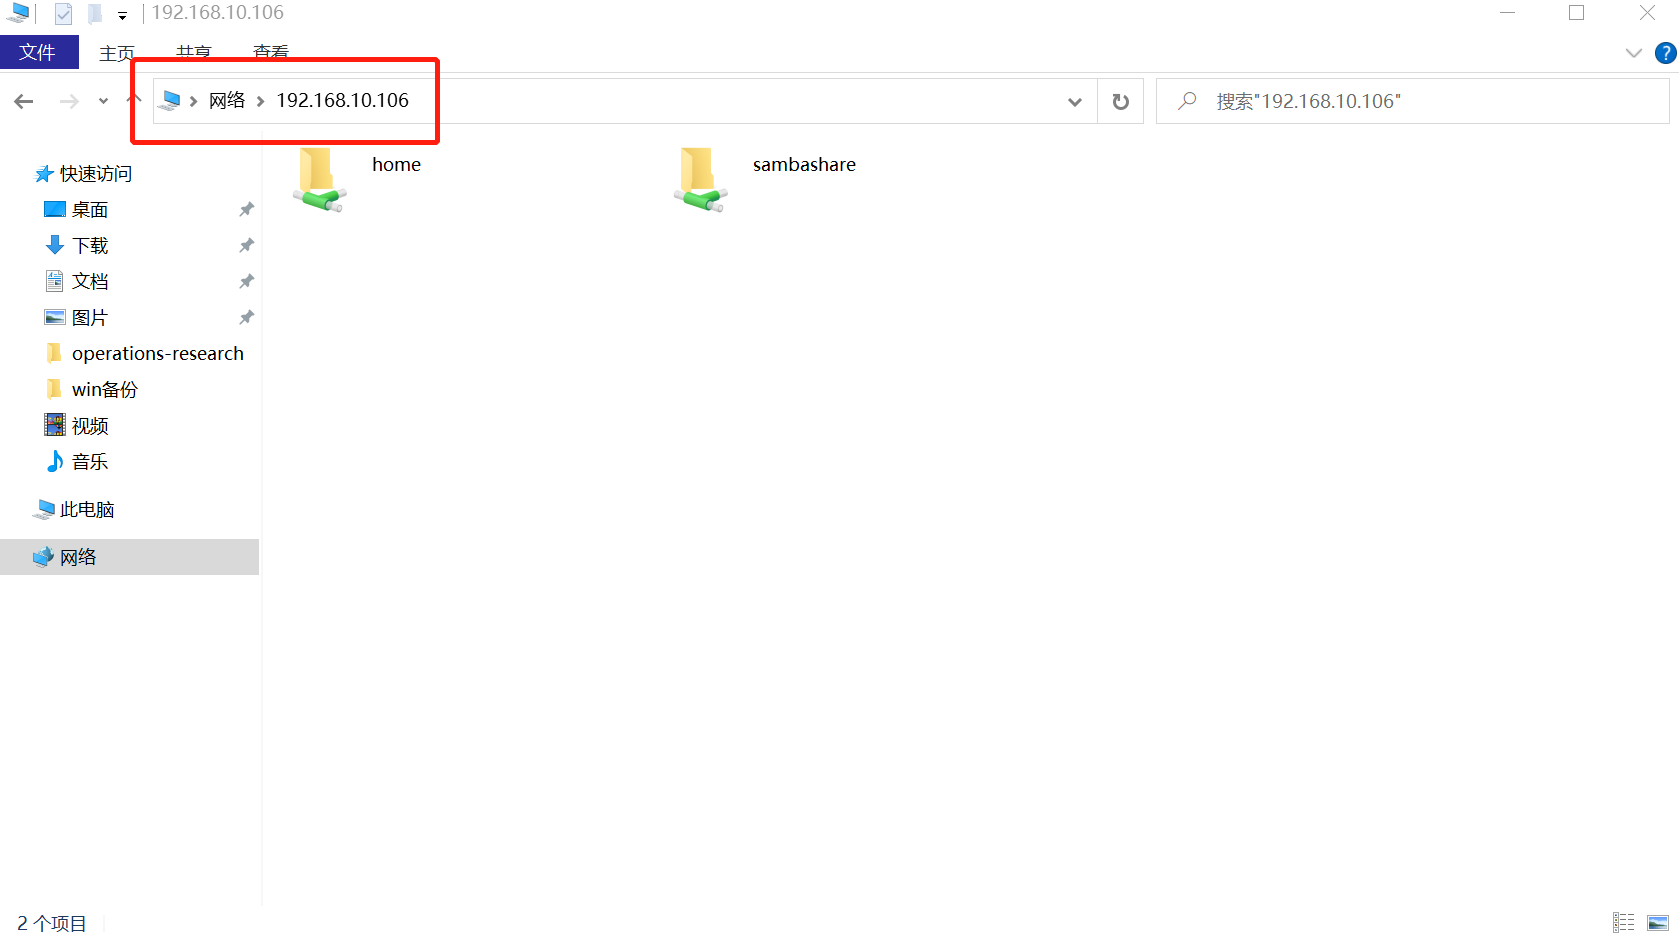
不要直接添加网络位置,使用如上图搜索添加即可不需要上述配置(网络后面输入:\ \ip网络位置)
git
此外,git需要重新输入邮箱和用户名后才能提交,主要的改动是因为win和wsl里面换行不同导致的变动
配置name,Email:
1 | git config --global user.name "username" |
1 | git config --global user.email "email" |
当前仓库:
1 | git config credential.helper store |
全局配置:
1 | git config --global credential.helper store |
Developing inside a Container
1 | wsl -l -v |
错误处理
使用jupyter导入scikit-image时发生报错,ModuleNotFoundError: No module named '_lzma',解决方案:
1 | sudo apt-get install libreadline-gplv2-dev libncursesw5-dev libssl-dev \ |
然后重新装python3.8.5
1 | pyenv install 3.8.5 |
重装日志
主机
2020年10月26日
重装原因:开关机需要很久,且关机后机箱还保持亮的状态。开机进入系统需要很长时间,开关机重启等操作需要强制关机,基本上无法开关机,由于不知道原因,不得不重装
原因分析:
抹掉原来系统盘后,重装了系统之后发现开机还是进不去,想了想近期就买了2块新的HDD,当拔掉硬盘线的时候发现一且都正常了。
也就是白白抹掉原来数据了…
- 然后只插了其中一块硬盘(4T)的线,发现启动正常了
- 然后只插了其中另一块硬盘(6T)的线,发现又启动不了了
- 再测试线发现线是好的
由于这块6T的蓝盘买了也没用过,偶尔还会发出哔的奇怪声音,所以基本断定是这个盘的问题
问题解决:
拔掉这个有问题的硬盘问题全部解决了,剩下就是不得不全部重装一遍,然后配置重新一遍环境
XPS
2021年4月29日
重装原因:为了整理日志,重新装一次